Monday, September 28, 2015

Fruit Pizza

This is my fruit pizza I made, it has cream cheese frosting and has fruit on top.


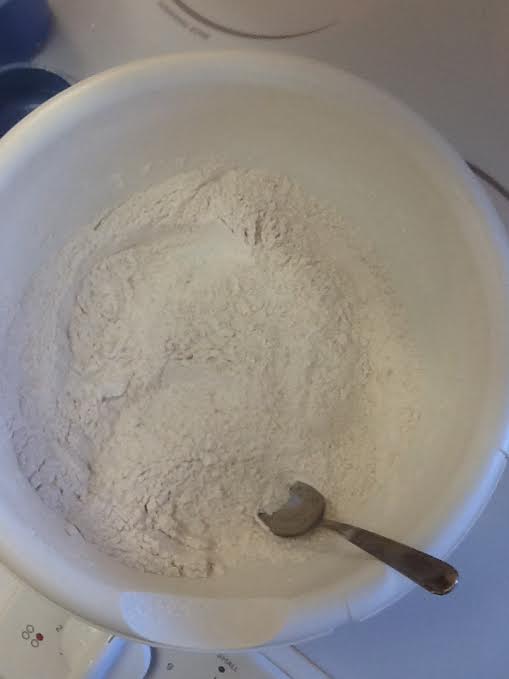
The first thing I had to do was preheat my oven to 350 degrees, then I had to make the crust. I made the sugar cookie crust out of flour, sugar, butter, egg, brown sugar, salt, baking powder and vanilla. I creamed my butter and sugars together and all the others besides the flour, to a kind of fluffiness or a yogurt look. Then I slowly added my flour into the mixture until it was a kind of sticky dough. I then lightly greased mt cooking sheet and rolled the dough into the pan, until it was like a half inch thick. Then i popped it into the oven for about 13 minutes. After that I pulled it out and let it cool for about ten minutes. As I was letting it sit I started making the frosting. I used a package of cream cheese, sugar, and vanilla. I started beating the cream cheese until it had a creamy look to it. I then added the sugar and vanilla until, again, it was creamy. After that I spread it on my crust. I then put wrap around it and put it in the fridge.

Then it was off to the fruit cutting to add on top. I had two oranges, two kiwis, one pineapples, and one apple. I started by cutting the skin off my kiwis and then cut them into little pieces to look nice. I then cut up my pineapple, I cut all the skin off that also and cut my pineapple up. I had way to much pieces so I ate quite a bit. I then did the same process with the oranges. I cut the apple up last because I didn't want it turning brown.

After all the fruit was cut I got my crust and frosting out of the fridge and put all of the fruit on top, it should have been placed neatly and arranged but I hurried through it, as you can see.
Displaying IMG_0109.JPG

Wednesday, September 23, 2015

Fruit pizza

Recipe by Patrick Campbell

To start off the a sugar cookie crust as the base. Then we made a cream cheese frosting. Then we cut up some fruits, pineapple, kiwi, apple, and oranges.

The first thing that I did was measured out all of the ingredients. We put butter and sugar in our electric mixer and made it smooth. Then added vanilla and  to the cream.next I added cream of tartar flour salt and baking soda. After i have finished that mix together. i took it out and spread it out evenly as I possibility could then cooked it for 8-10 mins. Then cook till golden brown.


The next day we started on the frosting. We beat the cream cheese to a pulp until t was smooth. Then i added sugar and vanilla to get it to another stage of deliciousness. The final step was to spread the frosting over the cookie evenly.

Then we had to cut up the fruit it took the longest time. I wasnt to good at cutting to start off but I got better after a little while. then squared up the fruit by cutting the sided the bottoms the n cut in half, then in fourths then chop them up or make them look like peporonies.

Then I put alot on but didn't have them sit on one another it was a suprise in every bite.


Country Fried Chicken

Country Fried Chicken

Recipe given by Mrs. Cummings

First I  stared with the leg and poped the bone out of its socket and movied to the wing then breast. Then I took my siccors and cut it so there was still skin on it so the breading could stay on better. Then we threw the backbone into a different pot.

We used mad dog (my partner) chicken. Mad Dog did the buttermilk while I measured out the salt, pepper, and the orgeno then we mixed it together. We then put the chicken pieces in the brine and let them sit in the fridge overnight because we don't have 6 hr in our 4th block to let them soak.

The next day, we got to fry the chicken. We first turned the oven on to 350 degrees because it takes awhile to heat up. Then we got out our electric skillet and set it to 350 degrees . Next we  measured out the oil and put it in the skillet and heated it up to 350.After that we made our breading with cajun seasoning pepper flour and last but not least salt. We mixed the ingredients and coated the chicken till it was well covered.Then we got to fry them till golden brown and 165 degrees. Next we put them on a wire rack and threw them in the oven to make the breading crisp it took only 30 min.

After we pulled out the chicken it was crisp and golden brown. My first bite was like heavan on a bone. It was so moist and juicy. i fell in love. 

Chicken Cacciatore

Chicken Cacciatore

The recipe given by Mrs. Cummings

This meal, I used our cut up chicken. We cut the chicken the day before, and it sat in the fridge overnight. We used the same oil for the oven fried chicken. Then we heated up the skillet to 350 degrees. Then we coated the chicken. I mixed flour, salt, and pepper. Next I put the pieces in the 350 degree oil until golden-brown.

While i the chicken was cooking we  cut up the vegetables. I started off by gathering the clove of garlic bell pepper .Tomato in a can oregano and white wine. It was really cool to see in side the bell pepper.

Then we dumped the old oil out and put clean oil in.after we put the veggies I put the chicken back in and added the oregano, white wine, and tomatoes and lowered the temperature to 325 degrees.For the next 30 min we covered it and let it do its thing, checking the inside of the chicken making sure it was 170 degrees before I could take it out. We then put it into a bowl and put them in the fridge for overnight.

The next day, we made noodles to go with the chicken. While the noodles were cooking, we put the chicken in the microwave and heated the pieces back up to 170 degrees. Once the noodles were cooked to perfection, we took them out and placed some on my plate. The chicken was moist but had a saggy breading from sitting in the fridge, then being microwaved it would have been better if it was fresh. You could really smell the white wine, but you couldn't really taste it. the tomate was one of the most flavorfull thing on my plate it kindof over took the the veggies. butt veryy delicous over all

Tuesday, September 22, 2015

Chicken Cacciatore

Chicken Cacciatore

Recipe given by Mrs. Cummings

In this meal, we used my cut up chicken. So the pieces were already cut up a day before, and sat in the fridge overnight. We also used the same oil from the country fried chicken that was left in the skillet. First we heated up the skillet to 350 degrees, and we didn't the oven for this meal. So I got out my chicken and started to make the coating. I mixed flour, salt, and pepper and then coated the chicken. I then gently put the pieces in the hot oil in the skillet and made sure each side was golden-brown.

While the chicken was in the skillet, me and my partner cut up the vegetables. I started off by mincing the garlic clove, while my partner got the half cup of onion. Next I cut up the green bell pepper, and it was my first time seeing the inside of a pepper and it was strange. I then took the chicken out and cleaned the skillet while my partner measure out the oregano, white wine, and got the can of tomatoes.

I then added the vegetables to the clean skillet and waited till they were golden brown. Once they were, I put the chicken back in and added the oregano, white wine, and tomatoes and lowered the temperature to 325 degrees. I then covered the skillet for 30 minutes, checking the inside of the chicken making sure it was 165 degrees before I could take it out. We then put the chicken and vegetables into a big bowl and put them in the fridge for overnight.

The next day, we started on the noodles to add with the chicken. While the noodles were cooking, we put the chicken in the microwave to heat the pieces back up to 165 degrees. Once the noodles were soft, I took them out and put a whole lot on my plate because I love noodles. The chicken was fantastic and was very moist as well as the vegetables too. Adding the vegetables, made this meal a little more healthy for me and it also tasted well! I couldn't really taste any garlic, or pepper, but I could definitely taste tomato. I could also taste and smell the white wine, but there was no alcohol because with the taste because the alcohol disappeared. Overall this meal helped me cut better with my knife, and so I think I have improved on that. I think ate more noodles than most of the chicken because the chicken was so hot, so next time I wouldn't leave it in the microwave for too long. (Sorry no pictures again).

Chicken Cacciatore

This is an Italian dish and I was very excited to make because I love Italian food!:)


First thing we had to do was add flour, salt and pepper into a bowl for the coating.

We coated the chicken then put them into the electric fryer and cooked them till they we golden brown.


While these were cooking, we had to chop up some onions, garlic and a bell pepper. The tomatoes are from a can.


When the chicken was done, we set that aside out of the skillet to cook the vegetables (just onion, garlic and peppers)

Once the onions were browned, we had to add the chicken, the tomatoes, oregano and wine. Covered it up and let it simmer for 30 min.

The look of this dish was colorful because of the tomatoes and the green peppers so it looked very tasty. The dish smelled very good when it came out of the skillet. The only thing wrong was that the food kind of burnt on the bottom, but other than that it was very good.

I was disappointed that it burnt, but otherwise I was pleased how this turned out!:)


Country Fried Chicken

This post is about the recipe I made for Country Fried Chicken! This recipe was somewhat difficult, just because we had learn how to cut the chicken and then leave it over night.

The first thing we did was cut the chicken. I was taught how to cut the wings, legs and breasts off of the chicken. After we cut them off, we put them in a marinade of buttermilk, thyme, Tabasco, Worcestershire, salt, and pepper.

The next day, we took the chicken out of the marinade and coated it with flour, salt, Cajun seasoning, and pepper. After coating the chicken, we put them in the electric fryer for a couple minutes, flipping them when they were golden brown.

When both sides were golden brown, we put them in the oven for a half hour to finish the cooking.

When we took them out they looked like this^

The appearance was very nice because they were cooked to golden brown. They looked delicious.
When I took the first bite, the outside was crunchy and the meat on the inside was cooked excellent. The whole thing tasted amazing.

This recipe was really fun to do because I have never cooked a chicken before and this was very fun!:)


Chicken Cacciatore

The preparation for the chicken was very similar to the other chicken that we made so it went smoother and more easily. As I was frying the chicken to the golden brown that we needed Cammy was working on cutting up the veggies.
Displaying image.jpg
Since we didn't have time to make all the chicken in one day it wasn't nearly as good as it could have been. I thought the chicken was kind of dry and really didn't care for it that much, but that also comes from me not liking to mix a lot of foods so all the mixed veggies and other things really didn't please me overly much. The noodles were done really well and I did enjoy those. The tomato didn't thrill be either. I'm not a big fan of tomatoes so that also hindered the dish for me.

The mushrooms were something that I did enjoy. I love mushrooms so they were wonderful to have. They helped me to enjoy the dish more.
Chicken Cacciatore

Recipe provided by Mrs. Cummings

IMG_20150916_143751202.jpgIn this specific recipe you repeat a lot of the same skills you learned from the Country Fried Chicken. You have to cut up the whole chicken the same way. Then you cover it in a flour base, stick it into hot oil and fry it until golden brown. The only difference is that we don't stick the pieces we fried into the oven. After you have fried them set them on a plate to the side for later. Once these are out you want to dump your hot grease out into a bowl and save it for later to dispose. After the grease is out you want to clean out the gross stuff in the bottom of the skillet to the best of your abilities.

IMG_20150916_143744851.jpgThe next thing that you have to do is to cut up your green pepper, onion, garlic, and mushroom if desired. You chop the pepper and onion, mince the garlic, and you cut the mushrooms into quarters. After they are all cut up you're going to place the pepper, garlic, and onion and saute it until the onion is slightly brown. Once that is done you'll bring back the chicken that you set aside earlier and place back into  the pan. Then you'll add the tomatoes, oregano, and wine. Cover and simmer for 30 minutes. When your chicken is to the safe temperature of 165 degrees you'll want to add your mushrooms so they heat up. These don't take long.

Once you have it all done you can serve over some pasta if so desires. My partner and I chose to have some pasta with it. This dish was not my favorite. I didn't really enjoy all of the things that went inside of it, and the chicken didn't have the fry to it that I thought it would. I wouldn't make this for myself again.
IMG_20150916_145146682.jpg

Monday, September 21, 2015

Country Fried Chicken

Country fried chicken is probably everyone's all time favorite food. This chicken went through many processes to get to where is was. Let me tell you the steps.

First of all, I had to cut up the chicken. This was a interesting task because sometimes I wasn't very sure if I was cutting in the right spot. Probably the easiest spot to cut was the breast. I will tell you that it was very difficult for me to pop the bone of the socket so it was easier to cut. As frustrated as I was, I still finished cutting up my chicken and I was the last one done.

This recipe called for 2 cups of buttermilk powder, which the back of the container tells you for 2 cups of buttermilk you use 4 tablespoons. With the 4 tablespoons of buttermilk, you also use 2 cups of water. This is mixed in with thyme, tabasco, and worcestershire, 1 tablespoon of salt, and 1 1/2 teaspoons of pepper. This marinade sat in the fridge all night.

Now, for this recipe we had to preheat the oven to 350 degrees fahrenheit and also had to turn the skillet to 350 degrees fahrenheit with also about 11/2 inches of oil.

While the oven and skillet are preheating we had a powder mixture to make. This mixture called for flour, salt, cajun seasoning and pepper. Everything was measured out right besides the salt. My partner put in 1 tablespoon of salt when it was suppose to be 1/2 a tablespoon of salt.

After the mixture was made up it was time to put our chicken in it and start frying it. This part was easy. We cooked the chicken in the frying pan until it was golden brown on both sides, Then we took it out to get ready to be put int the oven. Once all the chicken was golden brown, it was time to put it into the oven for about 30 minutes. All the chicken had to be at 165 degrees fahrenheit,

Our chicken looked amazing. It tasted really good, even with the extra bit of salt in the mixture. This chicken had a nice buttermilk taste to it and also a nice crisp outside. The first bite of the chicken was delicious. You could taste all the mixtures turn into once great bite.
Country Fried Chicken

Recipe provided by Mrs. Cummings

IMG_20150915_145246652.jpgThe first thing that needs to be done is to cut up your chicken. You must dislocate the bones on the wings, then cut at the point it is dislocated, repeat for the other wing, and both of the legs. Then you cut between the breast and the back. Once the back is out you place that along with the neck (if it was provided) into a big pot, fill with water, then bring to a boil while you fry your chicken later. Return to the breast and cut right down the center. This makes it so it isn't so big and is easier to fry.

IMG_20150915_141335895.jpgLeave the cut up chicken to the side. Next you need to make your brine. You need to combine the buttermilk, thyme, salt, and your pepper into a large bowl. This is so our chicken can marinate over night to soak in all of those different flavors. After the brine is mixed in well enough place the cut up chicken into the bowl, cover it up with plastic wrap, and place in the fridge to marinate over night.

IMG_20150915_142241165.jpgThe next day pull the marinated chicken out of the refrigerator. I then prepared my skillet. I placed about an inch to an inch and a half of oil inside of the electric skillet. Then I started to preheat it to 350 degrees. Next I made the flour base for the chicken. Combining the flour, salt, cajun, and pepper into a large bowl. After that was done I took one of the pieces of chicken into the flour base, and shook it around to cover the chicken into a nice coat of breading. Once that was finished I placed the covered chicken into the warm oil and fried it until a golden brown, then flipped. I repeated this step for all of my chicken. When the chicken was perfectly fried I placed it onto a cookie sheet with cooling racks inside so we could separate the grease and chicken. I placed it into an oven that was preheated to 350 degrees and cooked for about 30 minutes, or until the chicken reached its safe temperature of 165 degrees for each individual piece of chicken.

IMG_20150915_151824326.jpgIMG_20150915_142547945.jpgAfter the chicken was at its safe temp we took it out of the oven and left it to share with others. As I was eating my chicken I noticed how it fell right off of the bone. I enjoyed out I didn't have to work at it to eat it. The chicken just melted into my mouth with it's perfect combination of spicy and crisp.

Fruit Pizza

To start the fruit pizza off, we had to make a sugar cookie crust. First we creamed together butter and sugar until it was smooth. Creaming the butter and sugar together took awhile. After the butter and sugar was creamed together and all nice and smooth. Next, I added in the egg to the mix. I mixed the egg into the butter and the sugar until it was mixed together nicely. After that we started to add the flour, cream of tater, baking soda and salt. Now I mixed it all together until I couldn't see anymore of the whiteness of the flour in the bowl. I couldn't mix the mixture for too long because the flour would get tougher the longer it was mixing together. Now it was time to put the sugar cookie crust into the oven to bake. The cookie crust took about 15 minutes to get to be golden brown. After it came out of the oven we wrapped the sugar cookie and the pan with plastic wrap to work on the next day.

The next thing to do is to make the cream cheese frosting. This frosting is a mixture of cream cheese, powder sugar, and vanilla extract. I put the cream cheese into the mixer and mixed it until it was creamier than it was to start off. After it was nice and creamy I added in the sugar and mixed it for about 5-8 minutes. There was still some clumps of cream cheese and sugar. After that was mixed we added the vanilla and mixed that for about 2 minutes. When it was done I started to spread it onto the sugar cookie crust and it was kind of hard to spread and there were clumps of cream cheese and sugar still.

After getting the frosting done and the cookie baked the next thing to do is to cut up the fruit. I cut up pineapple, apples, oranges, and kiwis. The pineapple I bought was very big. It took awhile to cut up the pineapple. I used the gliding forward technique that was thought in class. The next thing i had to cut up was the apple. The apple was the easiest thing for me to cut. The next thing I cut was the kiwi. I had to feel off the fuzzy stuff on the outside of the kiwi and then started to cut the kiwi into half moon pieces. The oranges were not very simple. They were probably the hardest thing to cut.

Next thing to do was to put the fruit on the pizza. For me I organized it into different areas. I put the apples in one spot, kiwis and oranges into another spot, and for the pineapple I put it into its own area as I did for the rest of the fruit.

My fruit pizza looked very appealing. The colors made the fruit pizza stand out compared to other peoples. The flavor of the fruit pizza was delicious. The frosting was okay. I don't think the frosting got mixed all the way from when I tried it because it tasted too much like cream cheese. Otherwise I thought that the Fruit pizza was very delicious.


Country Fried Chicken

Country Fried Chicken

Recipe given by Mrs. Cummings

First I started off by cutting off the wings of the chicken. I had to pop the shoulder out of place in order to cut the wings off. To cut the thighs off, I had to dislocate them as well. I then cut off the breasts of the chicken and put the backbone in a separate bowl.

We used my partner's chicken for this dish (Zach Borrett). My partner did the buttermilk while I measured out the oregano, salt, and pepper. After he was done with the buttermilk, I added the ingredients to the buttermilk and mixed it. We then put the chicken pieces in the brine and let them sit in the fridge overnight because we ran out of time.

The next day, we got to cook the chicken. We first turned the oven on to 350 degrees because it takes awhile to heat up and then we got out our skillet and set it too 350 degrees as well. We then measured out the oil and put it in the skillet to heat up.We then made the coating for the chicken by combining, salt, Cajun seasoning, flour, and pepper. We may have added a little to much salt, but I thought it turned out well. Anyway, we mixed the ingredients and coated the chicken all over. After that, we put them in the skillet with the oil and made sure each side was evenly golden-brown. We then put them onto a rack on a cooling sheet that was put into the oven for 30 minutes, making sure that the chicken itself was 165 degrees.

After the 30 minutes was over, I was ready to dive into this golden and juicy piece of chicken. I did and it was really moist, and tender! I could definitely taste the salt and pepper, but it wasn't bad. The fat gave it a little more flavor which I personally love. The next time my mom brings chicken home I am definitely using this recipe! (Sorry I forgot to take pictures).

Chicken Cacciatore

    This is an Italian style meal that can be served over hot spaghetti noodles.

    I started this recipe by heating up the electric skillet with the oil to 350 degrees.  I then got my chicken out of the fridge and set it to the side.  (My partner had already cut up the chicken the day before.)  While the oil was heating, I started on the coating.  I mixed the flour, salt, and pepper in a bowl and began to coat the chicken.  I then put the chicken in the hot oil to brown on both sides.

    While the chicken was browning, I started to prepare the vegetables.  I chopped the green bell pepper and minced the clove of garlic.  I also got a 1/2 cup of onion, which was previously cut up.  I then opened the can of tomatoes and measured the oregano and white wine.

    Once the chicken was done, I emptied the oil and cleaned out the skillet.  I then added the onion, garlic, and bell pepper to the skillet to sauté.  I returned the chicken to the skillet once the onions were slightly browned.  I also added the tomatoes, oregano, and wine.  I covered it and reduced the heat to 325 degrees to simmer for about 30 minutes.  No need to worry, all of the alcohol in the wine was evaporated.  The only reason the wine was added was to help concentrate the flavors.

    After 30 minutes, I checked the temperature of the chicken.  When the chicken's internal temperature was at 165 degrees, I took it out.  We didn't have enough time to finish the recipe, so I put the chicken in the fridge over night.

    The next day, I took my chicken out and started on the noodles.  The spaghetti was very easy to make.  All I had to do was boil the water and add the noodles.  While the noodles were cooking, I heated up my chicken to an internal temperature of 165 degrees.  Once the noodles were soft, I took them out and added the chicken on top.

    I thought the chicken tasted pretty good.  It was still juicy and had nice flavors.  I personally didn't really like the vegetables because they were a little burnt.  Next time, I would reduce the heat even more to avoid burning.  I thought the chicken went well with the bed of spaghetti noodles on the bottom.  The spaghetti was cooked for the right amount of time.  But, I thought the noodles were a little bland, next time I would add some salt to give more flavors.

   Overall, this recipe was fairly easy to make, and it turned out pretty well.


Sunday, September 20, 2015

Fruit Pizza Post


This is my fruit pizza I made in Foods. It has a sugar cookie crust, cream cheese frosting, and an assortment of fruits on top. This recipe was very easy and I would recommend this type of dish at parties:)


The first thing I started was the sugar cookie dough. I had to cream butter and sugar together, then I added the eggs and vanilla. After those were well blended, I mixed in the dry items. Then I put it on a  pizza pan and in the oven for 10 minutes or until it was golden brown. We let it sit overnight in plastic wrap. The next day we made the cream cheese frosting. I started with creaming the cream cheese so it was as smooth as peanut butter. After I mixed the vanilla and powdered sugar I spread the frosting on the cookie. I then cut up oranges, apples, kiwis, and pineapples and arranged them in a cool pattern.

I thought the pizza tasted really good. The fruit was small enough to eat, the cookie was soft but not crumbly. I personally don't like cream cheese, but since we added sugar in it, it was kind of good. the slices I made were a little big but they were like the size of a normal pizza. Overall, the pizza tasted very delicious!:)

The look of the pizza was very eye appealing. I lined the kiwis on the outside (see pic) and the added the apples, oranges, and pineapples. The oranges, I think, made the fruit pizza look more eye appealing.

This was a very fun first dish to make and it is very easy!

Fruit Pizza

Fruit Pizza

Recipe from Mrs. Cummings.

For this recipe, we started off making a sugar cookie crust as the base of the pizza, and then topped it with cream cheese frosting. After putting on the frosting, we put on cut up pineapples, kiwi, apples, and oranges.

I first measured out my ingredients, and then creamed the butter and sugar until it was smooth. I wanted the cream to be smooth, and creamy so I creamed it until I saw no bumps and it was all smooth. Once it was smooth, I added vanilla extract and eggs and mixed it in with the cream so it was all one. I then added the dry ingredients: flour, baking soda, salt and cream of tartar until they were all mixed together. After I got the pizza pan out, I spread the mixture out onto the pan, and made sure it was flat and equal all around. I put it in the oven and cooked it for 10 minutes, by then it was golden brown and ready to come out.

Now it was time to make the cream cheese frosting. I mixed the cream cheese until that was creamy and looked almost like pudding. I then added the vanilla extract and powdered sugar until they were one. After, I spread the frosting all over cookies and made it was equal everywhere.

Since the frosting was cookie, I needed to cut up my fruits and put them on the pizza. I cut the fruits up into little bite-size pieces.  I then spread them all over on the pizza so it was mixed up evenly.

This was my first time trying kiwi, and a fruit pizza and they both surprised me how delicious and sweet they tasted. I could've organized the fruits on the pizza better so that it was pleasing to the eye and to make it look neat and nice. I could definitely taste the vanilla, but I like vanilla so it was sweet to me. I also could've cut the kiwi pieces a little thinner.

Saturday, September 19, 2015

Country Fried Chicken

     Country Fried Chicken is a delicious meal to make at home.  I had never made this recipe before, and I had no problems with it.

     I started by cutting off the wings with my kitchen shears.  At first, cutting was kind of tricky because I had to dislocate the bones before I started to cut the meat off.  But after I got a hang of it, it became easier.  I then cut off both of the thighs using the same technique.  The last step of cutting the chicken was to cut off the breasts.  I first separated the back from the breasts and set it aside.  After that, I cut straight down the middle of the breasts to make them easier to cook.

    After I got all of my chicken cut up, I started on the brine.  First, I got out the dry buttermilk and added water to it, mixing until all of the lumps were blended.  I then measured out the correct amounts of thyme (oregano), salt, and pepper and added them to the buttermilk.  Once everything was well mixed, I added my chicken to the brine.  Because we had a limited time, we covered the chicken and put it in the fridge to marinate.

    The next day, it was time to cook the chicken.  The first thing I did was put the oil in the electric skillet and preheat it to 350 degrees.  I also preheated the oven to 350 degrees as well.  While I was waiting for the oil to heat up, I started on the coating.  I combined the flour, salt, Cajun seasoning, and pepper in a large bowl.  Once it was blended and the oil was heated, I started to coat my chicken.  I made sure every part of the chicken was well covered because the coating helps give it flavor.  To avoid splatter, I used tongs to gently set the chicken in the hot oil.  After a few minutes or until the chicken was golden brown, I flipped them over. 

    When all of the chicken was done, I set them on a cooling rack that was placed on a cookie sheet.  I then put the chicken in the oven to finish cooking.  After about 30 minutes, I checked the chicken's temperature.  When the internal temperature was at 165 degrees, I took the chicken out to cool.

   After the chicken was cooled, I got my first taste of it.  It was delicious!  I absolutely loved how juicy and moist the chicken was.  It was heaven compared to the dry, disgusting chicken they serve at school.  I also really enjoyed the coating, it was crispy, just the way I like it.  The one thing I didn't like was the skin.  I am not a fan of fat on my meat, so I just picked it off.

This recipe was fun and not too challenging to cook.  I may just try to make it for supper at home!


Fruit Pizza

      This recipe was entirely new to me.  I had never had a fruit pizza until I made one in Foods class.  A Fruit Pizza is basically a sugar cookie with cream cheese frosting and chopped up fruit arranged on top.  I thought the recipe was fairly easy, and it could be done at home with no problem.

     First off, I preheated my oven to 350 degrees.  I got out all of the ingredients and equipment needed, before I  started baking.  I made sure to get my butter and sugar in the Kitchen Aid right away.  They needed to mix for several minutes until soft and creamy.  This helped make the dough nice and smooth without any lumps.  Once the butter and sugar was done creaming I then added the eggs and the vanilla.  While everything was blending, I started to mix my dry ingredients together in a separate bowl.  These ingredients included, flour, baking soda, salt, and cream of tartar.  I then added them to the Kitchen Aid very carefully.  I made sure the setting was low, otherwise my flour mixture would have gone EVERYWHERE!  I mixed the dough until blended, making sure not to over mix.  If I were to  over mix, my dough would have ended up too thick and the baked cookie would have been very dense.  I then put my dough on an ungreased pizza pan and spread it until even.  I used a rubber scraper to spread it, instead of plastic wrap because I thought it was easier.  I then put it in the oven for 8-10 minutes or until golden brown.


     While my cookie was baking, I started on my frosting.  First, I started by creaming my cream cheese until it was smooth.  I then added the vanilla and brown sugar.  Once it was nice and blended, I put it on the cookie and spread it until it was even all around.

    Once I finished my frosting, I began to cut up my fruit.  I cut up my kiwi, pineapple, oranges, apples, and strawberries.   I made sure to make the slices visually pleasing because they were the focal point on the pizza.  I made one mistake of cutting my finger while I was cutting my orange. This happened because I was in a rush to get done.  After all of my fruit was cut, I arranged them on my pizza in the way I thought was "pretty".

   I enjoyed the taste of my fruit pizza.  I thought the cookie was cooked for the right amount of time, and had a nice consistency.  The frosting was very creamy and balanced well with the cookie.  I really liked the fruit on top.  The fruit was all cut to the perfect size to pop in my mouth.  All of the elements of my fruit pizza worked and tasted well together.

Overall, I think my fruit pizza turned out very well.  I would definitely make this recipe again.

Friday, September 18, 2015

Fried Chicken


For the fried chicken we started off by cutting up my chicken into the usual legs, thighs, wings, and breasts. I'm one who doesn't enjoy cutting up already dead animals so that part was a little difficult for me just like biology was. The only noticeable difference that I had with my chicken is that I accidentally drug out the thigh bone as i was pulling off my leg, other than that though I had no other issues.

The brine for the chicken went very well, and most likely would have been better if i had taken more time to drain my chicken, but since time was short I rushed it. This cause the brine, when I came back the next day, to look pink.

Battering the chicken was a little different for me since I'm used to the way that I do it at work. Still it went very smoothly and I had plenty of time to do it while my chicken was turning golden brown. Browning the chicken took quite a bit longer then expected, but as it turns out my chicken was 6.5 pounds and that's probably what caused it to take so long.

Baking the chicken was relatively easy. With the exception of the breasts everything was done after the initial 30 minutes, the breasts had to go on for about 10 more minutes. After letting the chicken cool down to where i could actually eat it I was thoroughly surprised at the the amount of juice still in the chicken. It was quite delicious with it being extremely juicy and the batter that we                                                  used complemented to chicken amazingly.

Fruit Pizza-T.J. Kummerfeldt


For the fruit pizza that I made I thought it was rather dry. This is most likely from us having to let it stay out over night. Even though both the frosting and the cookie itself dried out overnight and took away from the fruit pizza. The same went with the fruit. After setting in the refrigerator overnight a majority of the fruit lost its crispness, namely the apples, and the rest of the fruit lost a lot of its flavor. Eating the fruit pizza was still quite delicious, and was very appealing to the eye

The process for making the pizza was relatively easy and straight forward, and it was a great way for me to get used to the kitchens again since I don't remember a whole lot from freshman year.

The making of the sugar cookie crust was easy except for when I needed to smooth it out. The process for smoothing it out didn't work very well for me and the crust looked rather lumpy.

While making the frosting I was rather surprised by how long that it took me. But, after spreading the frosting over the crust, it was back to looking really well. the frosting was able to cover up the lumps that I had made and made it all look even again.

The layers of the fruit i thought was very nice. The circles of fruit from biggest to smallest helped to go with the slices of the pizza. This also made the pizza a little easier to cut since i could usually find openings in-between the fruit.

Cleanliness in the Kitchen

Chef Ramsey might give you a pass on the cleanliness of our kitchens comparison to what he has experienced in restaurants around the world.

But when it comes to keeping the kitchen safe, we need to make sure that everything is wash down with hot (and I do mean hot) water and soap.

Raw poultry is especially a concern when cleaning up the cutting boards, knives and wiping down surfaces.

Where in your kitchen did you "slack off" with cleanliness after the last lab? Explain.
Fruit Pizza

Recipe provided by Mrs. Cummings.

In this recipe we made a sugar cookie based crust, along with a cream cheese frosting, and then an assortment of cut up fruit to your preference.


IMG_20150909_150403585.jpgI first started by creaming together the butter, and sugar until it was smooth. I did this because you don’t want any lumps in your crust and if it is not creamed it will not come out correctly. After it was creamed I added the eggs and mixed it until the eggs and the vanilla until it was blended well inside of the cream. Then I added all of my dry mixes like the flour, baking soda, salt, and cream of tartar. After it was creamed and blended correctly, I spread the dough out evenly on an ungreased pizza pan. Cooked it in the oven for 8 to 10 minutes. After it was cooked to a nice golden brown I removed the crust and left it to cool.


IMG_20150911_113754047.jpgFor the frosting I made sure to blend the cream cheese until it was lump free, just so your frosting didn’t come out with big cream cheese lumps. Once it was all smooth I added the vanilla and powdered sugar, then blended it until it was nice and smooth. I then spread the frosting evenly over the cooled pizza crust.


IMG_20150911_113750121.jpgAfter I got my frosting spread I cut up my fruit. I cut my pineapple, apple, kiwi, and oranges into small enjoyable bites. After they were all cut up I started to place them onto my pizza in a neat pattern so it looked pleasurable to the eye. After it was all placed I cut up to share with people.


IMG_20150911_114421439.jpg


I thought that the pizza was delicious overall. I would have liked if the crust tasted more like a sugar cookie simply because I have a sweet tooth. I also wish I hadn’t placed the oranges onto it because they were bigger than the other fruit and harder to cut up.

Wednesday, September 9, 2015

Judy Vaupel's Kolaches

This recipe was shared with me from Judy Vaupel.


In this recipe you must first activate the yeast. That means you add the yeast to warm water (90-115 degrees) along with a little sugar. In several minutes the yeast should start to "grow". Once it has shown that it will grow, you then add it to the milk mixture that has cooled off.

As with all yeast products, it needed to rise until doubled. At that time I punched it down and then portioned it into balls the approximate size of a golf ball. Letting it rise again took another 30 minutes and then I could use my fingers to pull a "well" into the middle of the ball.

The filling I used was a homemade apricot and a purchased cherry pie filling. The apricot was made by cooking dry apricots with sugar and water. Once they were tender I blended them in the food processor to make it a slightly chunky mixture.

The color of the kolaches is a golden brown around the edges, with slightly darker spots in the area where more heat hit.

The first bite confirms that the yeast portion was light and airy with a very slight chewy aspect. The yeast flavor was light and it combined well with the sweetness of the filling.

These kolaches were challenging to make as a new baker. Portioning the dough and shaping it was the hardest part.